Why Is a Build Token Needed?
GitHub repositories are private by default (even for public repositories, external systems still require authorization to monitor changes). Cloudflare needs a valid authentication credential to access your repository contents.
How to Delete a Build Token?
When using Cloudflare Workers to connect to a GitHub repository for project deployment, the system automatically generates a Build Token. Even after the project is deleted, these Build Tokens may still remain in Cloudflare.
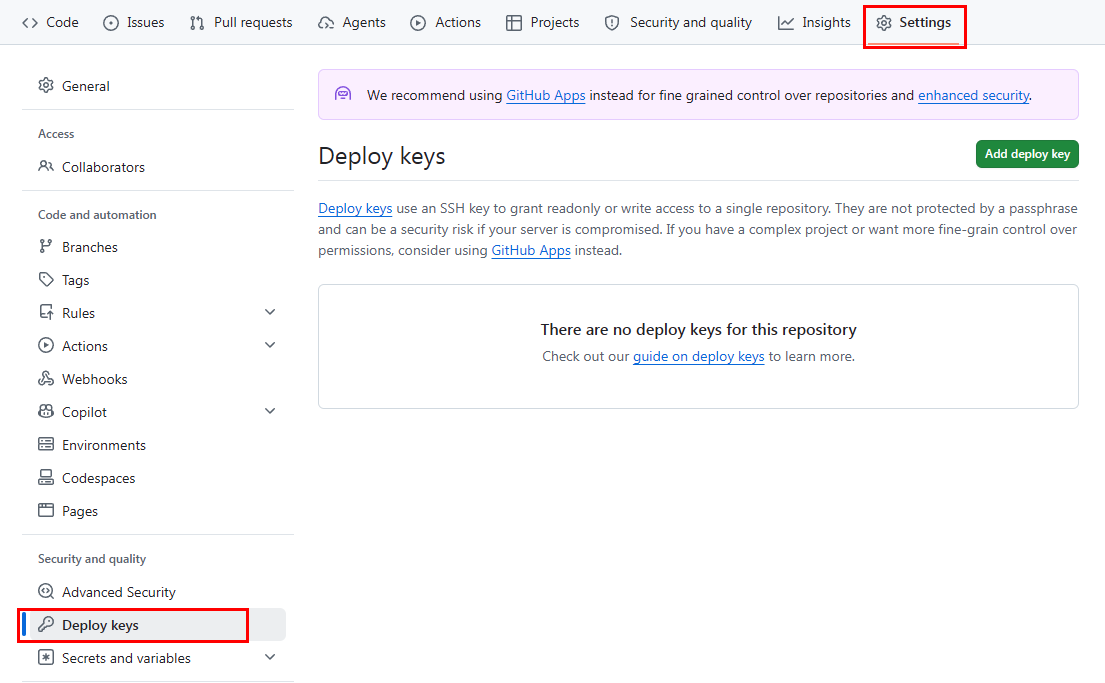
GitHub Side: Delete GitHub Deploy Key
Go to your repository → Settings → Deploy keys and delete it.
Cloudflare Side: Delete Cloudflare Build Token
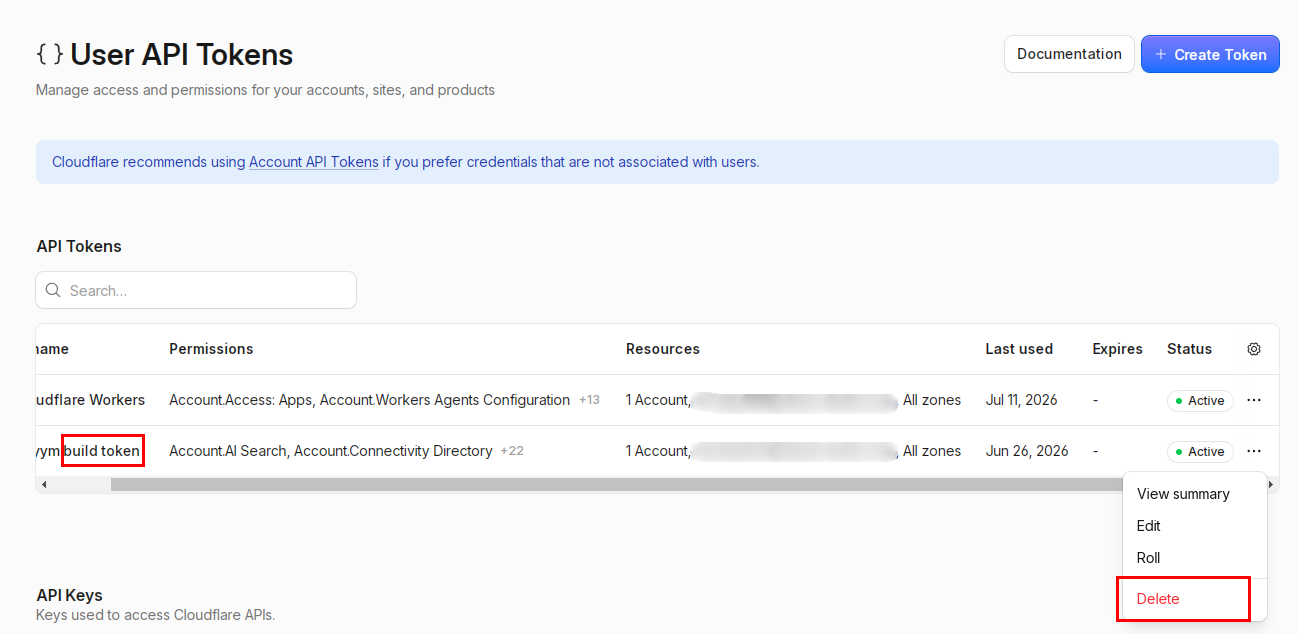
Delete User API Token
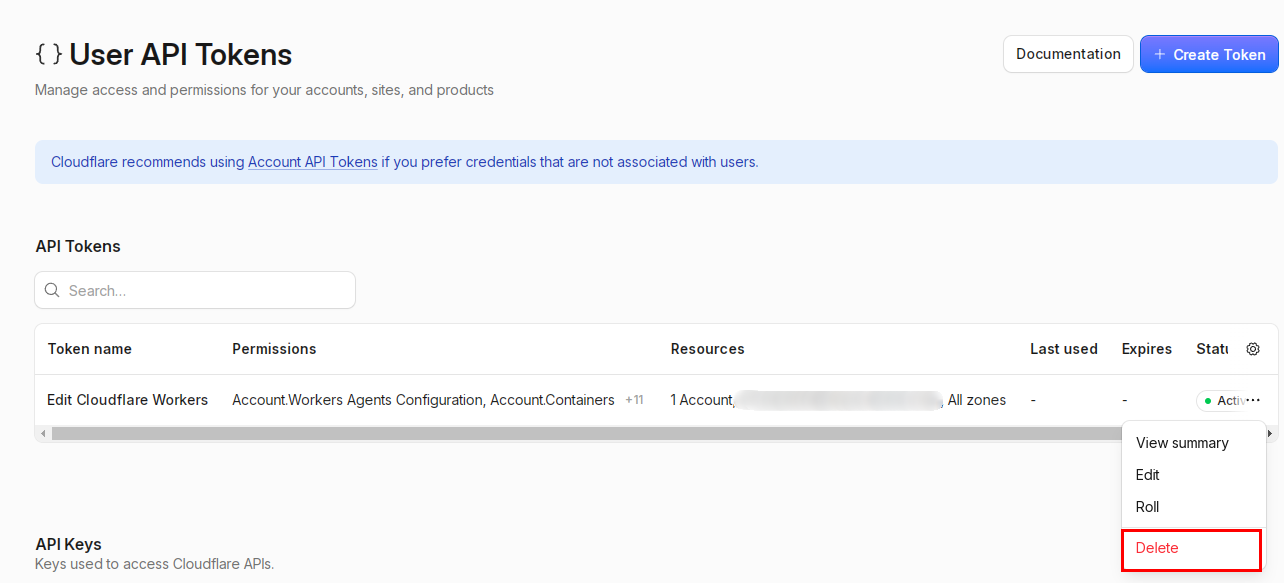
First, open this page, find the API Token ending with build token, and delete the token.
Delete Build Token
After logging in to the Cloudflare Dashboard, you will see a string of characters. This is your Account ID.

dash.cloudflare.com/[Account ID]
Method 1: Delete Build Token Through Browser Console
This method uses the internal Dashboard API endpoint and relies on browser session cookie authentication. No API Token is required.
Open the Cloudflare Dashboard and keep this page open. On Windows, press F12 or Ctrl + Shift + J; on Mac, press Command + Option + J. You can also right-click anywhere blank on the webpage, select Inspect, and then switch to the Console tab.
Execute the following code in the console to query the build token UUID. Make sure to replace YOUR_ACCOUNT_ID.
The first time you use the browser console, you need to confirm activation according to the prompt.
|
|
After the console outputs a successful request, open the Network tab. Among the generated traffic, locate the GET request named tokens.
Select this request and find build_token_uuid in result under Preview or Response. This is the build token UUID that will be used later (note that it is build_token_uuid, not cloudflare_token_id).
Then execute the following code in the console to delete the build token. Make sure to replace YOUR_ACCOUNT_ID and YOUR_BUILD_TOKEN_UUID.
The first time you use the browser console, you need to confirm activation according to the prompt.
|
|
If the console returns a Deletion successful message, the build token has been successfully deleted.
Method 2: Delete Build Token Using curl
This method uses the official Cloudflare API endpoint and requires an API Token.
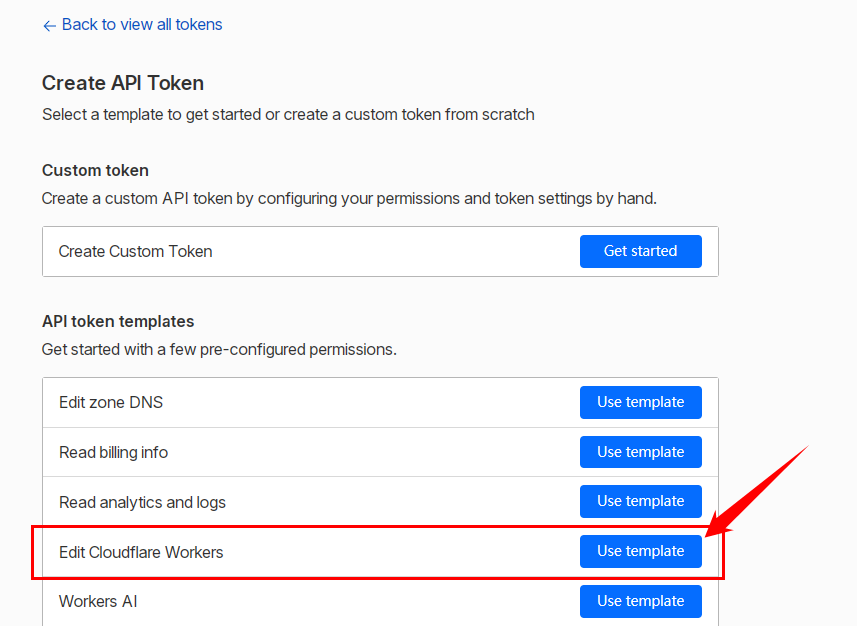
Return to this page and click Create Token.

Select the Edit Cloudflare Workers template.
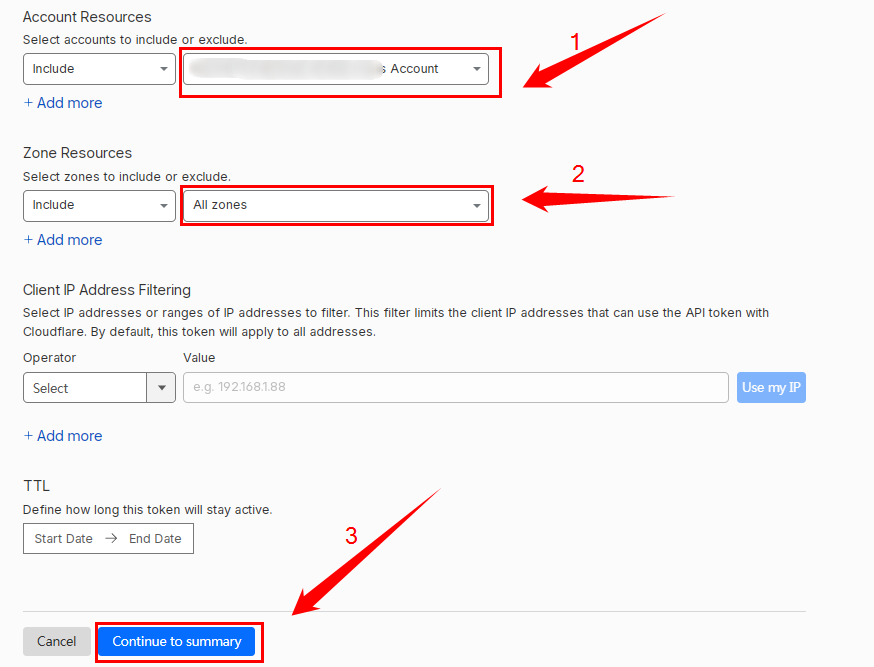
For Account Resources, select your Cloudflare account. For Zone Resources, select All Zones, then click Continue to summary.
Click Create Token.
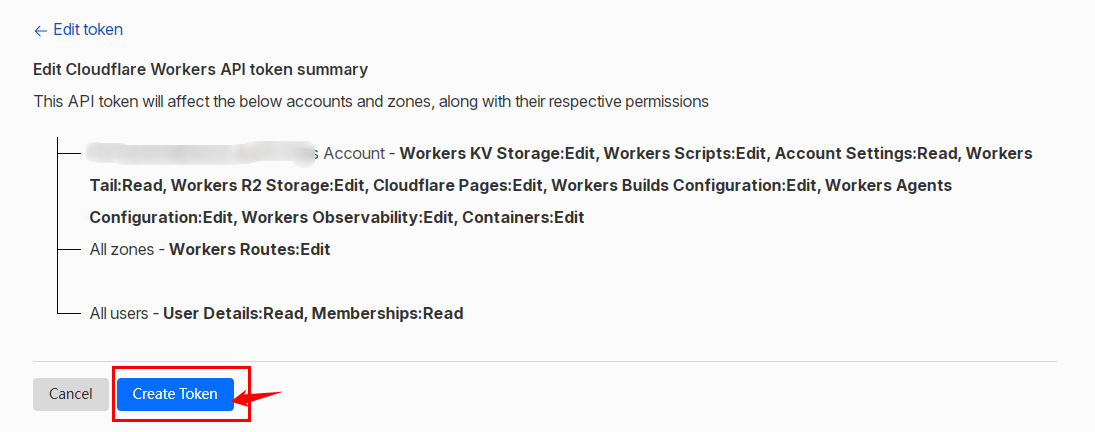
You will receive a User API Token starting with cfut_. If your account used a User API Token before April 2026 and you have not replaced it, it may not have the cfut_ prefix. Keep this Token safe. It will only be displayed once.
Next, use the curl command to send a GET request to query the build token UUID.
|
|
Make sure to replace
[Account ID]and[Your Token].
The response will look like this:
|
|
The value of build_token_uuid is the build token UUID. Record this UUID, then use the following curl command to send a DELETE request to remove this build token.
(Note: use build_token_uuid, not cloudflare_token_id.)
|
|
Make sure to replace
[Account ID],[build token uuid], and[Your Token].
If the response is as follows, the build token has been successfully deleted.
|
|
Finally, delete the User API Token you just created to prevent accidental exposure.